DocuSign Integration
Overview
DocuSign eSignature allows users to send and sign documents electronically.
Certain documents in iCraneTrax can be created and sent for signing to the appropriate individuals.
Step 1: Set up a DocuSign account
Create a DocuSign account at  www.docusign.com and start with a 30 day free trial.
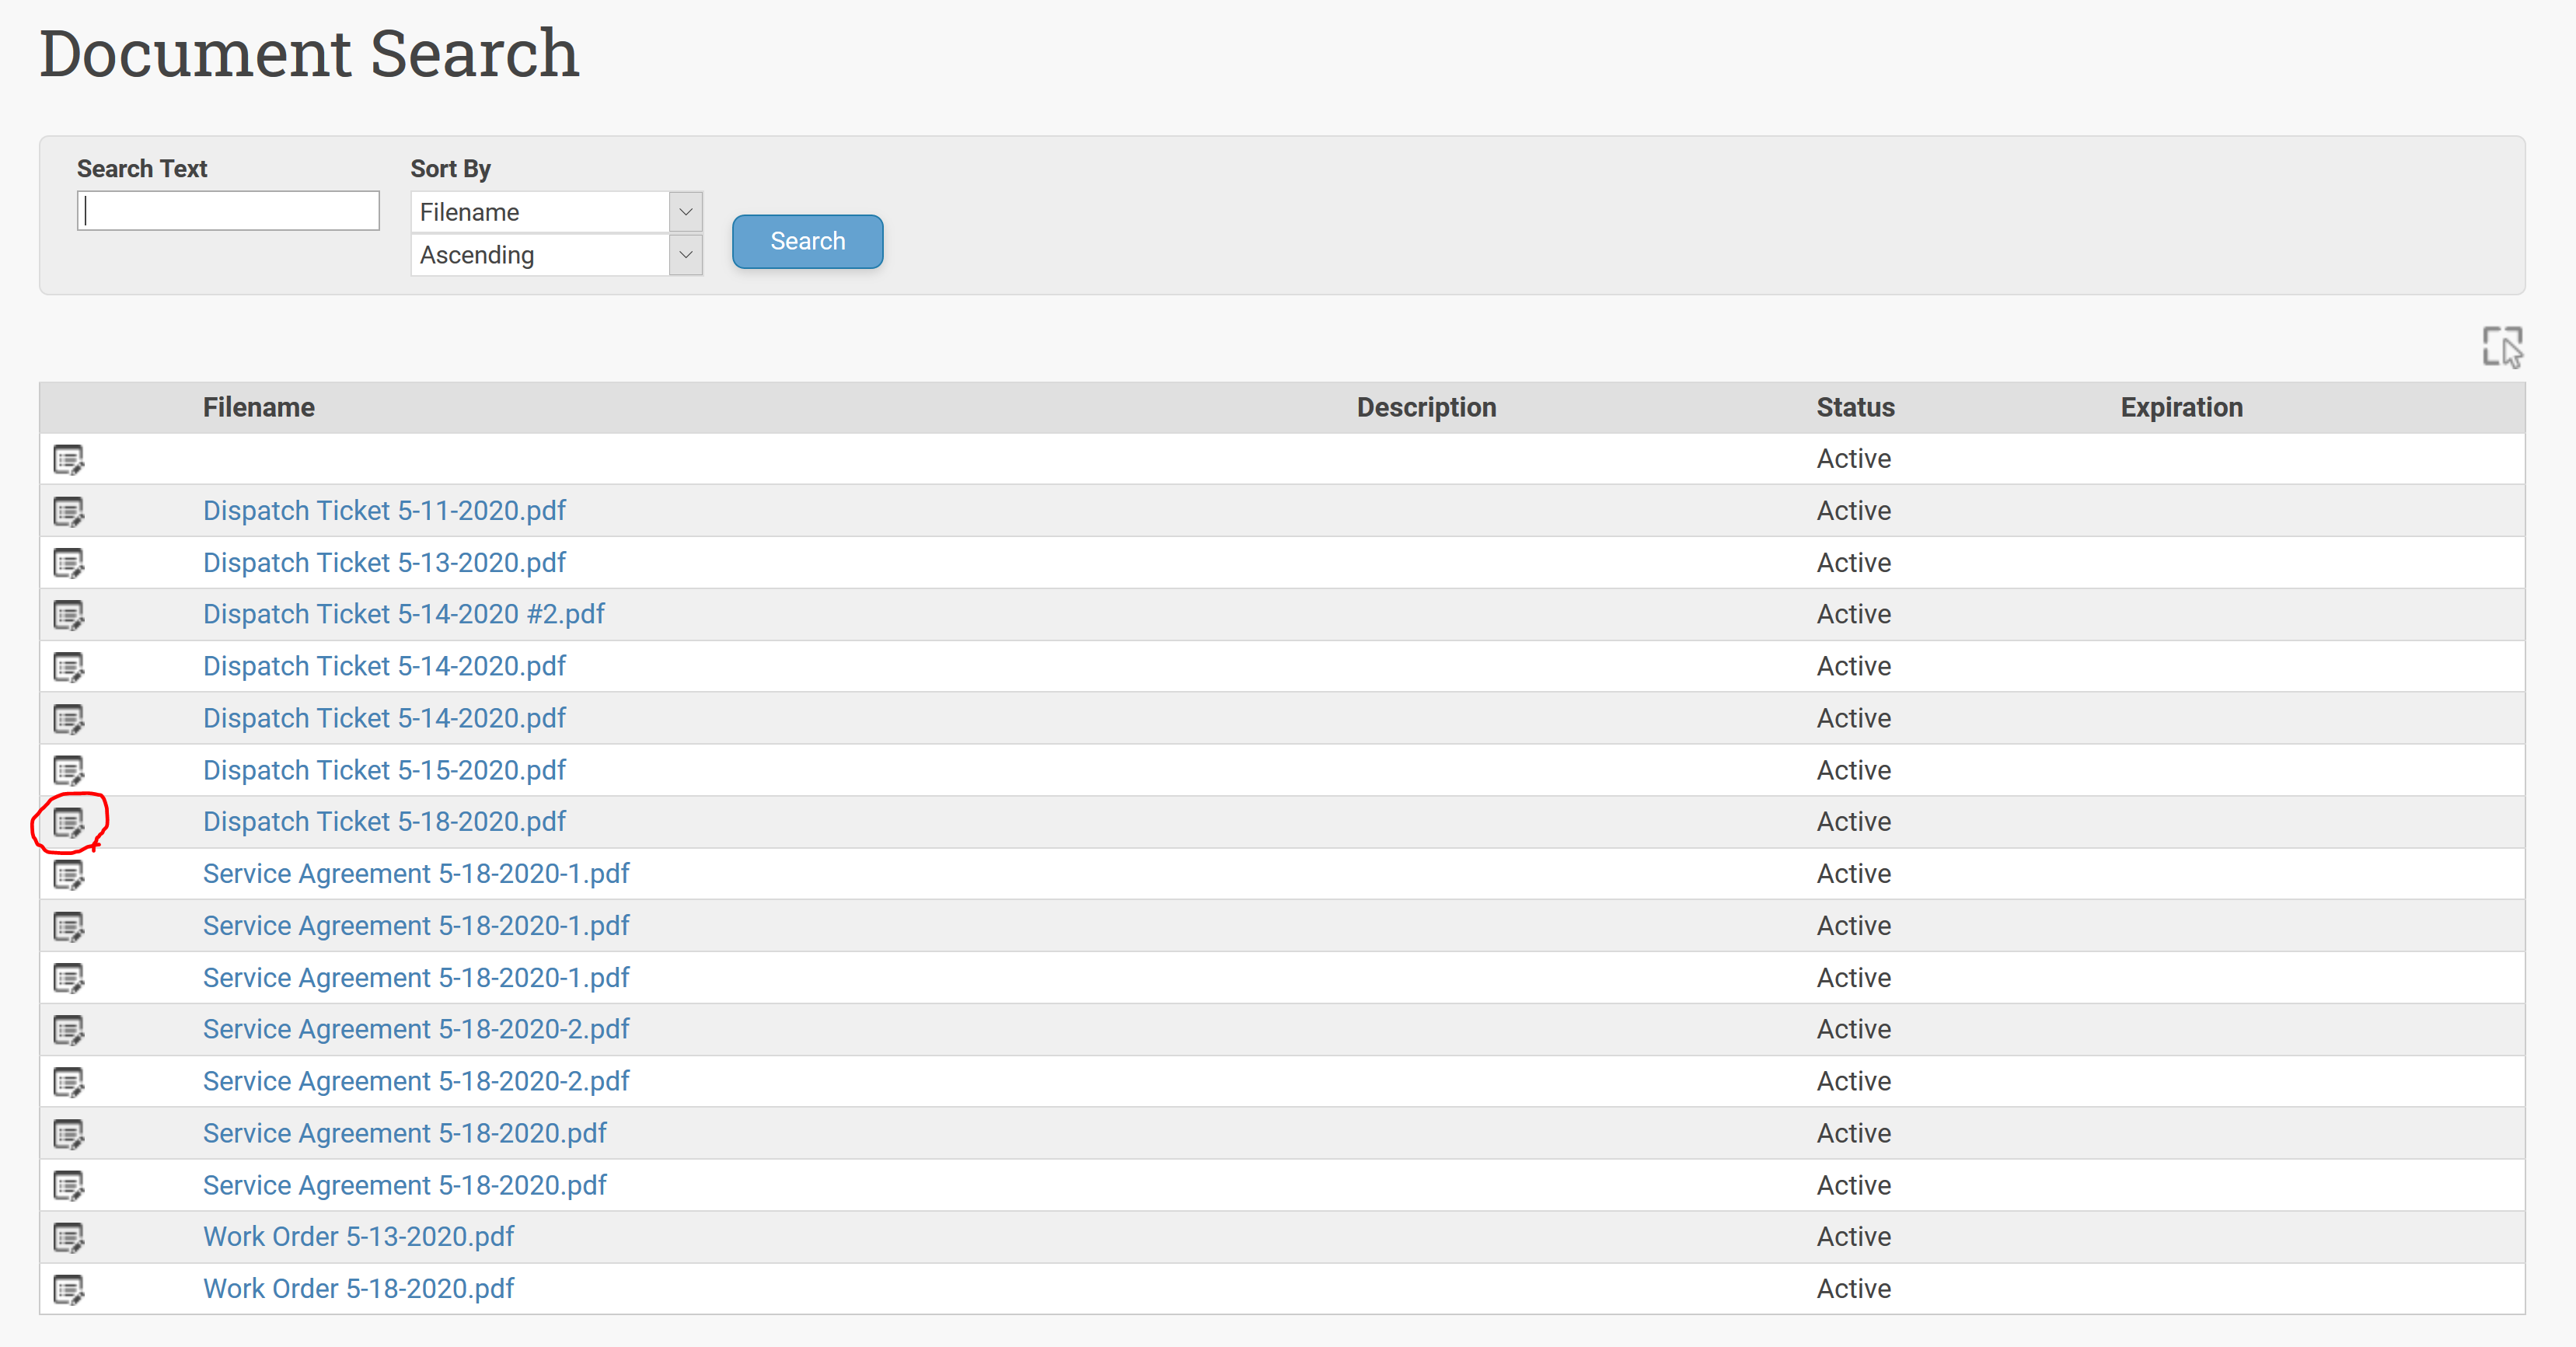
Step 2: Select document
Select the document you wish to send for e-signing. This can be done from either
the Document search page or by selecting the Document from the Job that
it is associated with.
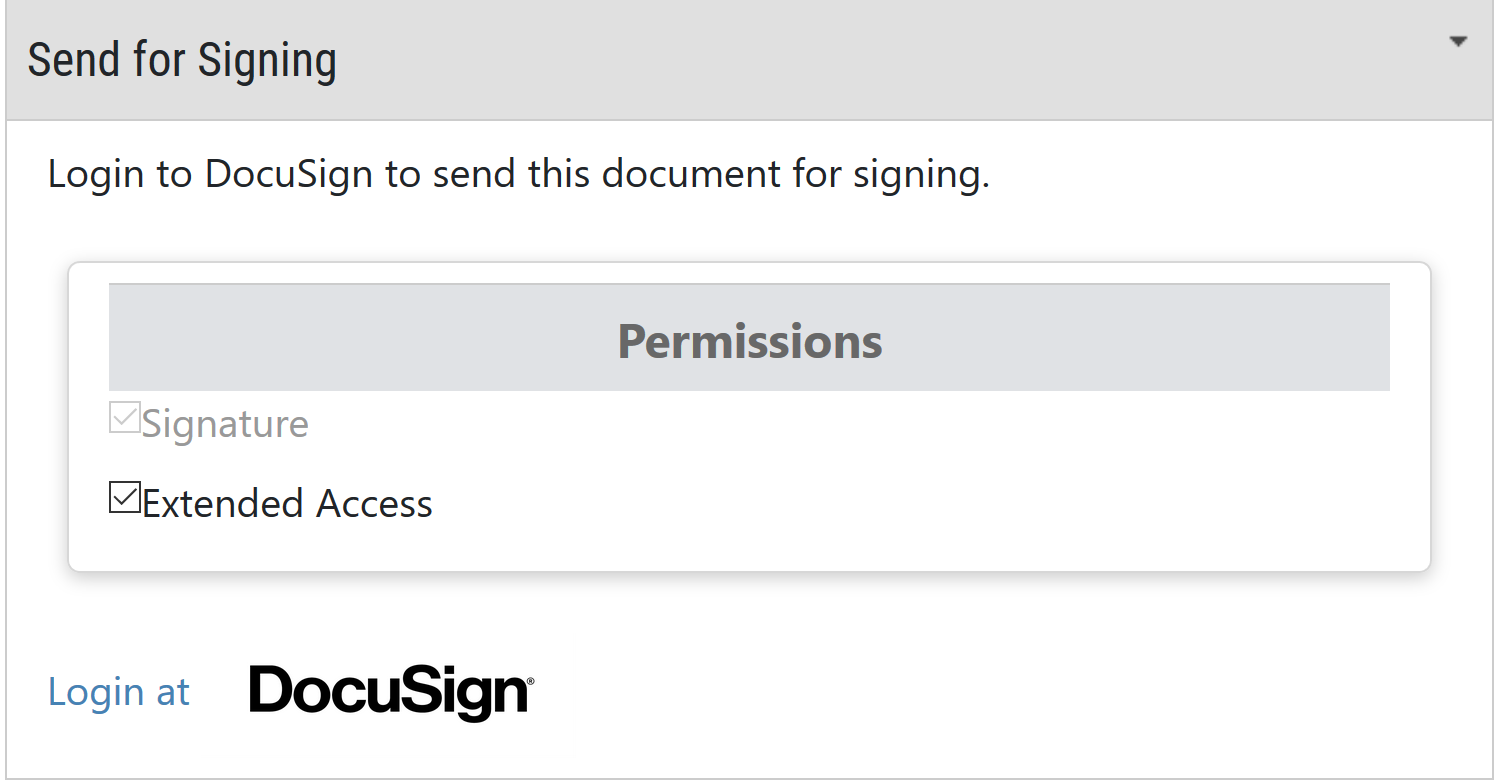
Step 3: Login to DocuSign
Expand the "Send for Signing" panel on the document page. Checking the "Extended Access" checkbox will
allow you to stay logged in to DocuSign for longer periods of time, reducing the number of times you are asked
to log in. Click the login to DocuSign link to login. Doing this should re-direct your browser to a DocuSign login page.
Step 4: Grant iCraneTrax Access to your DocuSign account
You will be redirected to the DocuSign login page. After logging in, allow iCraneTrax access to your DocuSign account.
If you grant iCraneTrax extended access and use the service once or more per 30 day period,
then you will not need to log in again.
If you do not grant extended access, then you will have to log in every 30 days.
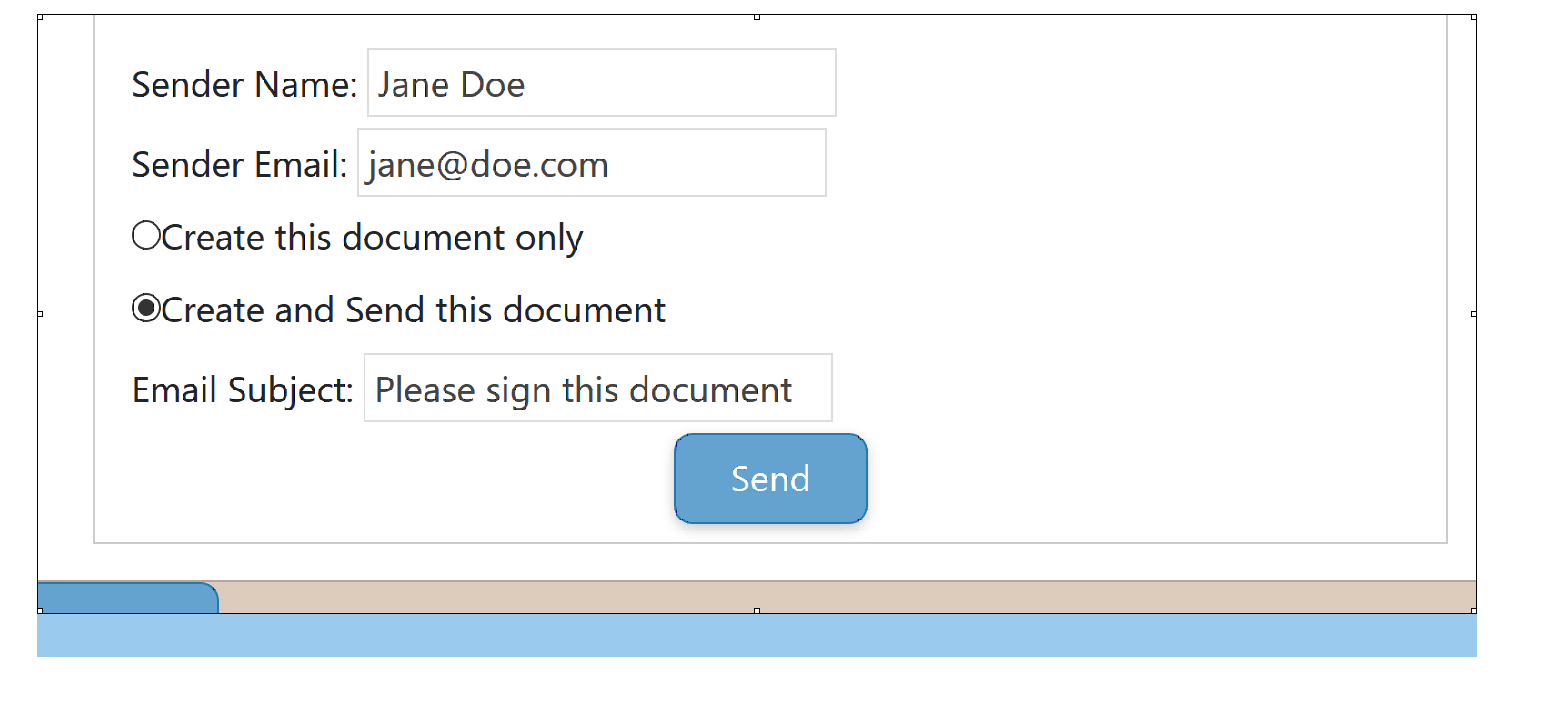
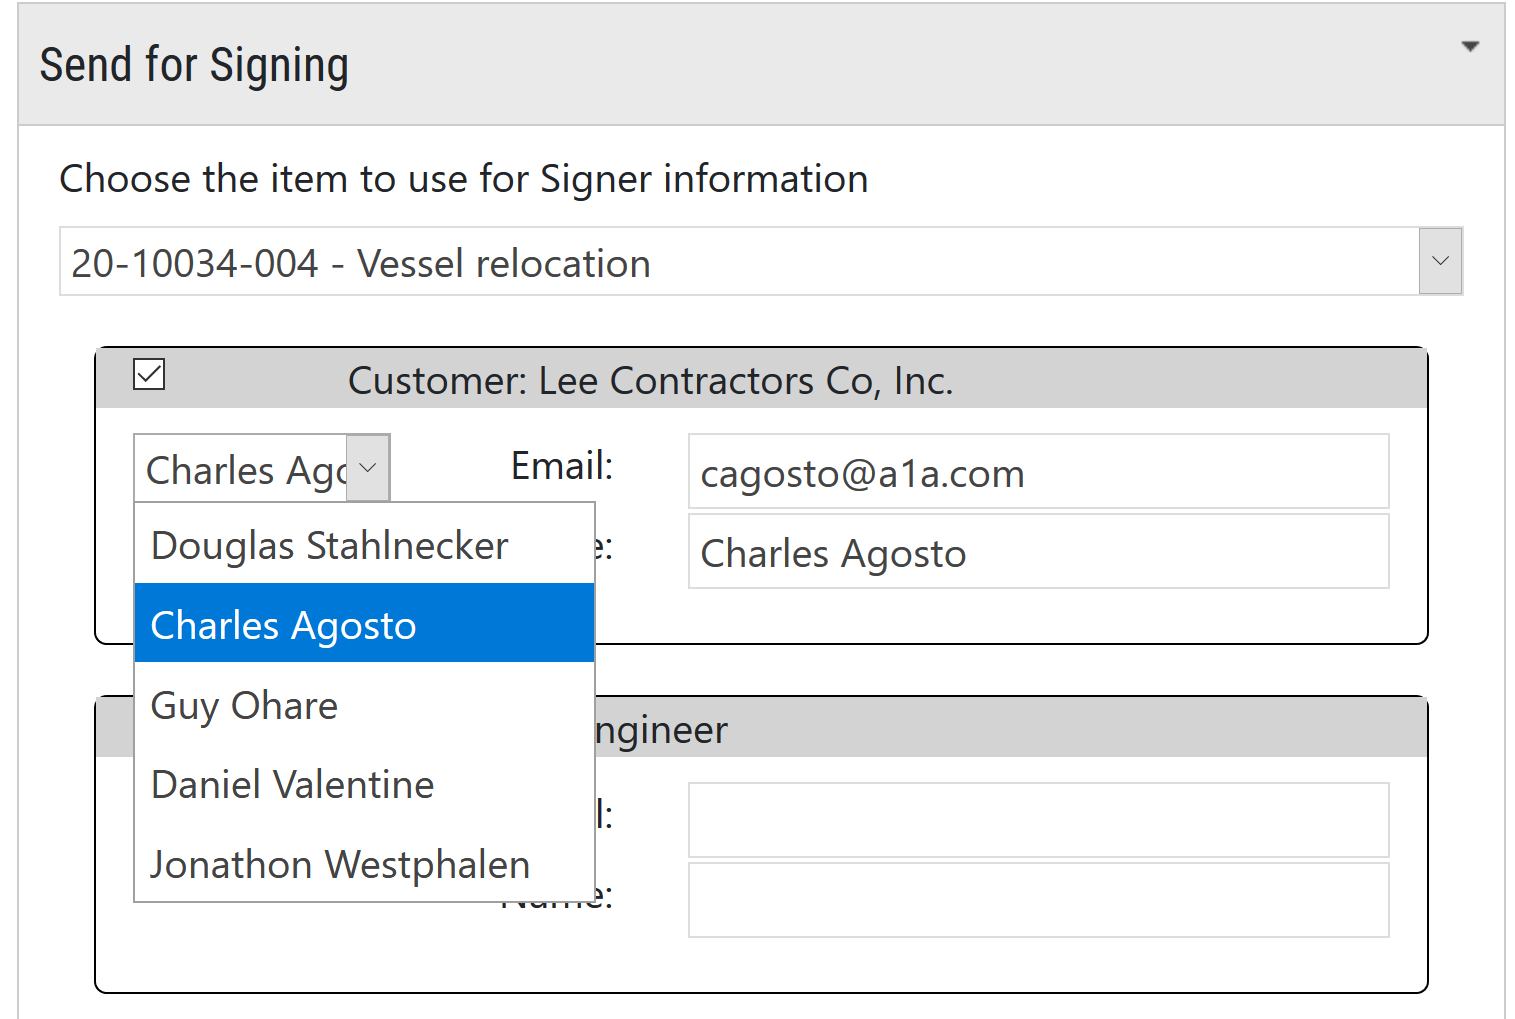
Step 5: Fill out Send for Signing section
Fill out the "Send for Signing" section with the appropriate names and email addresses. Email addresses cannot be duplicated.
You can remove a signer from the list by unchecking the checkbox next to the role.
Step 6: Send the document for signing.
Click on either the "Create this document only" or "Create and Send this document"
radio buttons to access the Create or Send button, respectively.